
Introduction
The holiday season is here, and what better way to celebrate than by decorating your nails with festive designs? In this Christmas nails tutorial, we will walk you through step-by-step instructions to create stunning nail art that will make you the center of attention at any holiday gathering. Whether you prefer simple and elegant designs or bold and flashy ones, we have got you covered!
Materials Needed
Before we dive into the tutorial, let's gather the materials you will need:
- Base coat
- Red, green, and white nail polishes
- Glitter nail polish
- Nail art brushes
- Dotting tools
- Nail studs or rhinestones
- Top coat
Step 1: Prep Your Nails
Start by removing any old nail polish and filing your nails into your desired shape. Apply a base coat to protect your natural nails and create a smooth surface for the polish to adhere to.
Step 2: Classic Red Nails
If you love the classic look, opt for a festive red nail polish. Apply two coats of red polish, allowing each coat to dry completely before moving on to the next step. Finish with a glossy top coat for a polished finish.
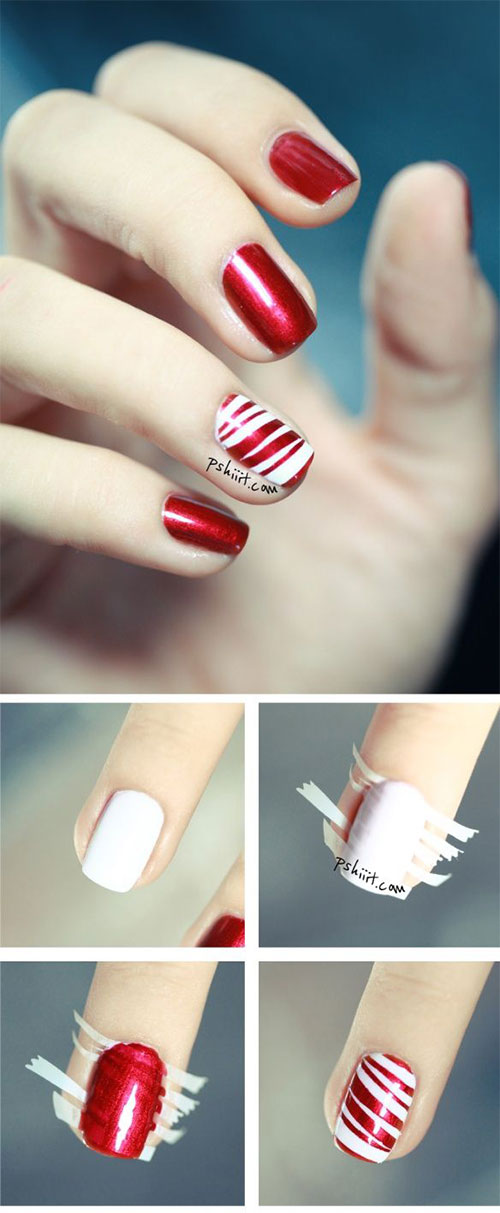
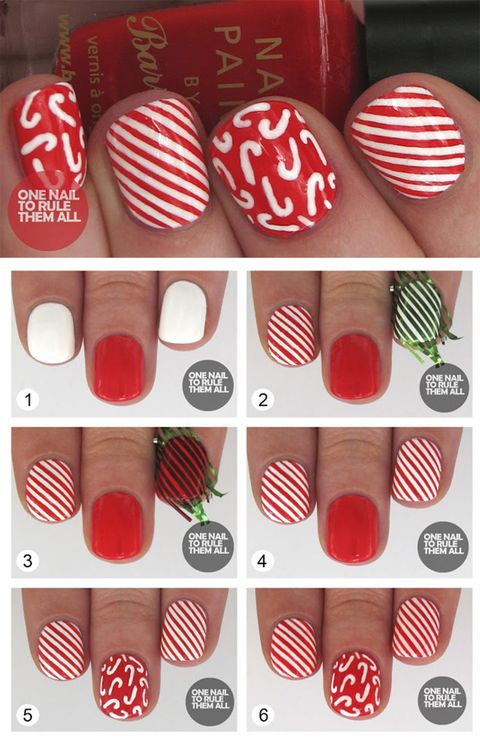
Step 3: Candy Cane Nails
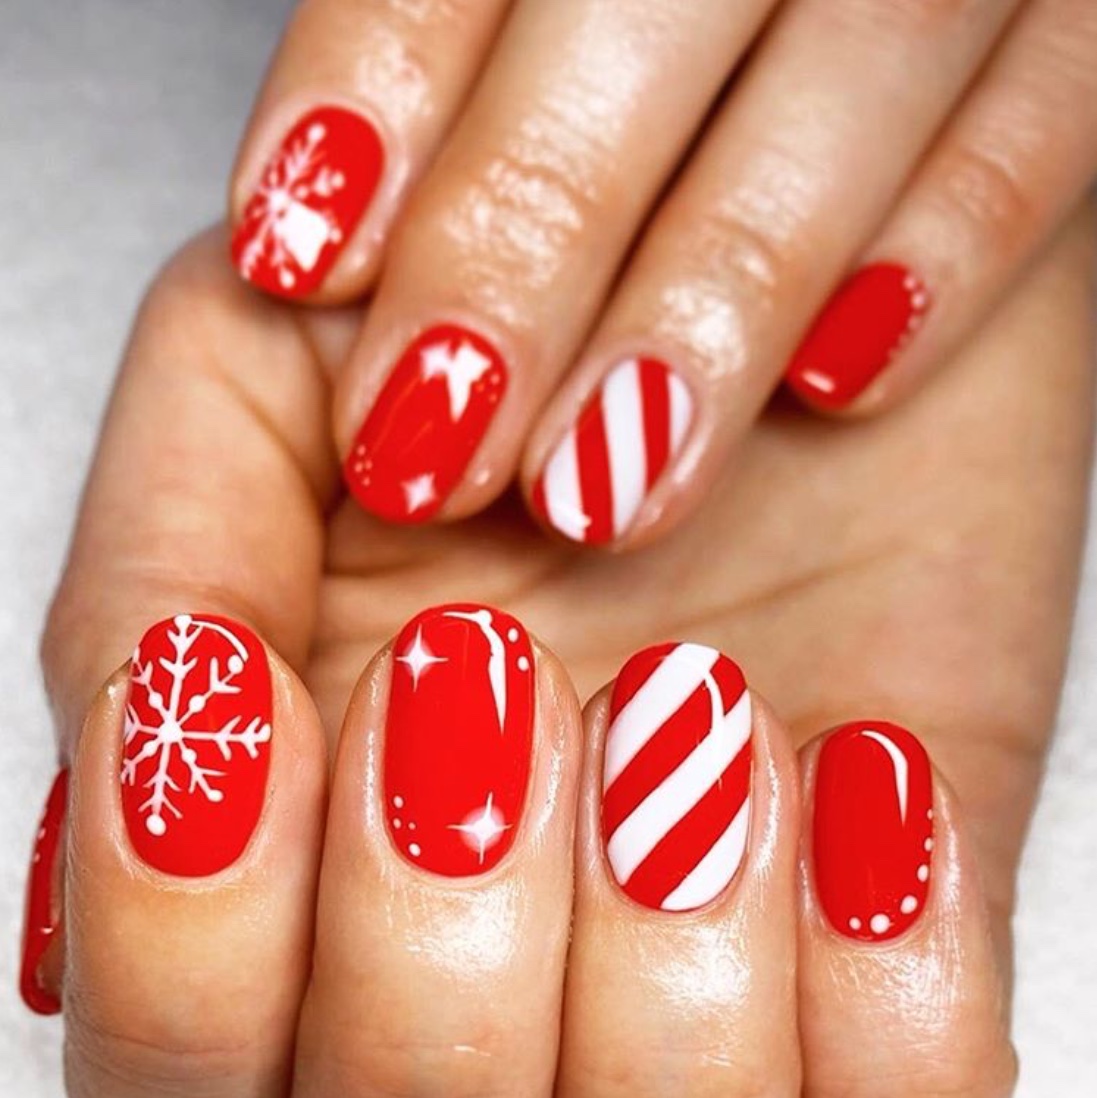
To achieve candy cane nails, start with a white base coat. Once dry, use a thin nail art brush to create diagonal red stripes on each nail. Alternate the direction of the stripes to mimic the look of a candy cane. Seal the design with a top coat to prevent chipping.
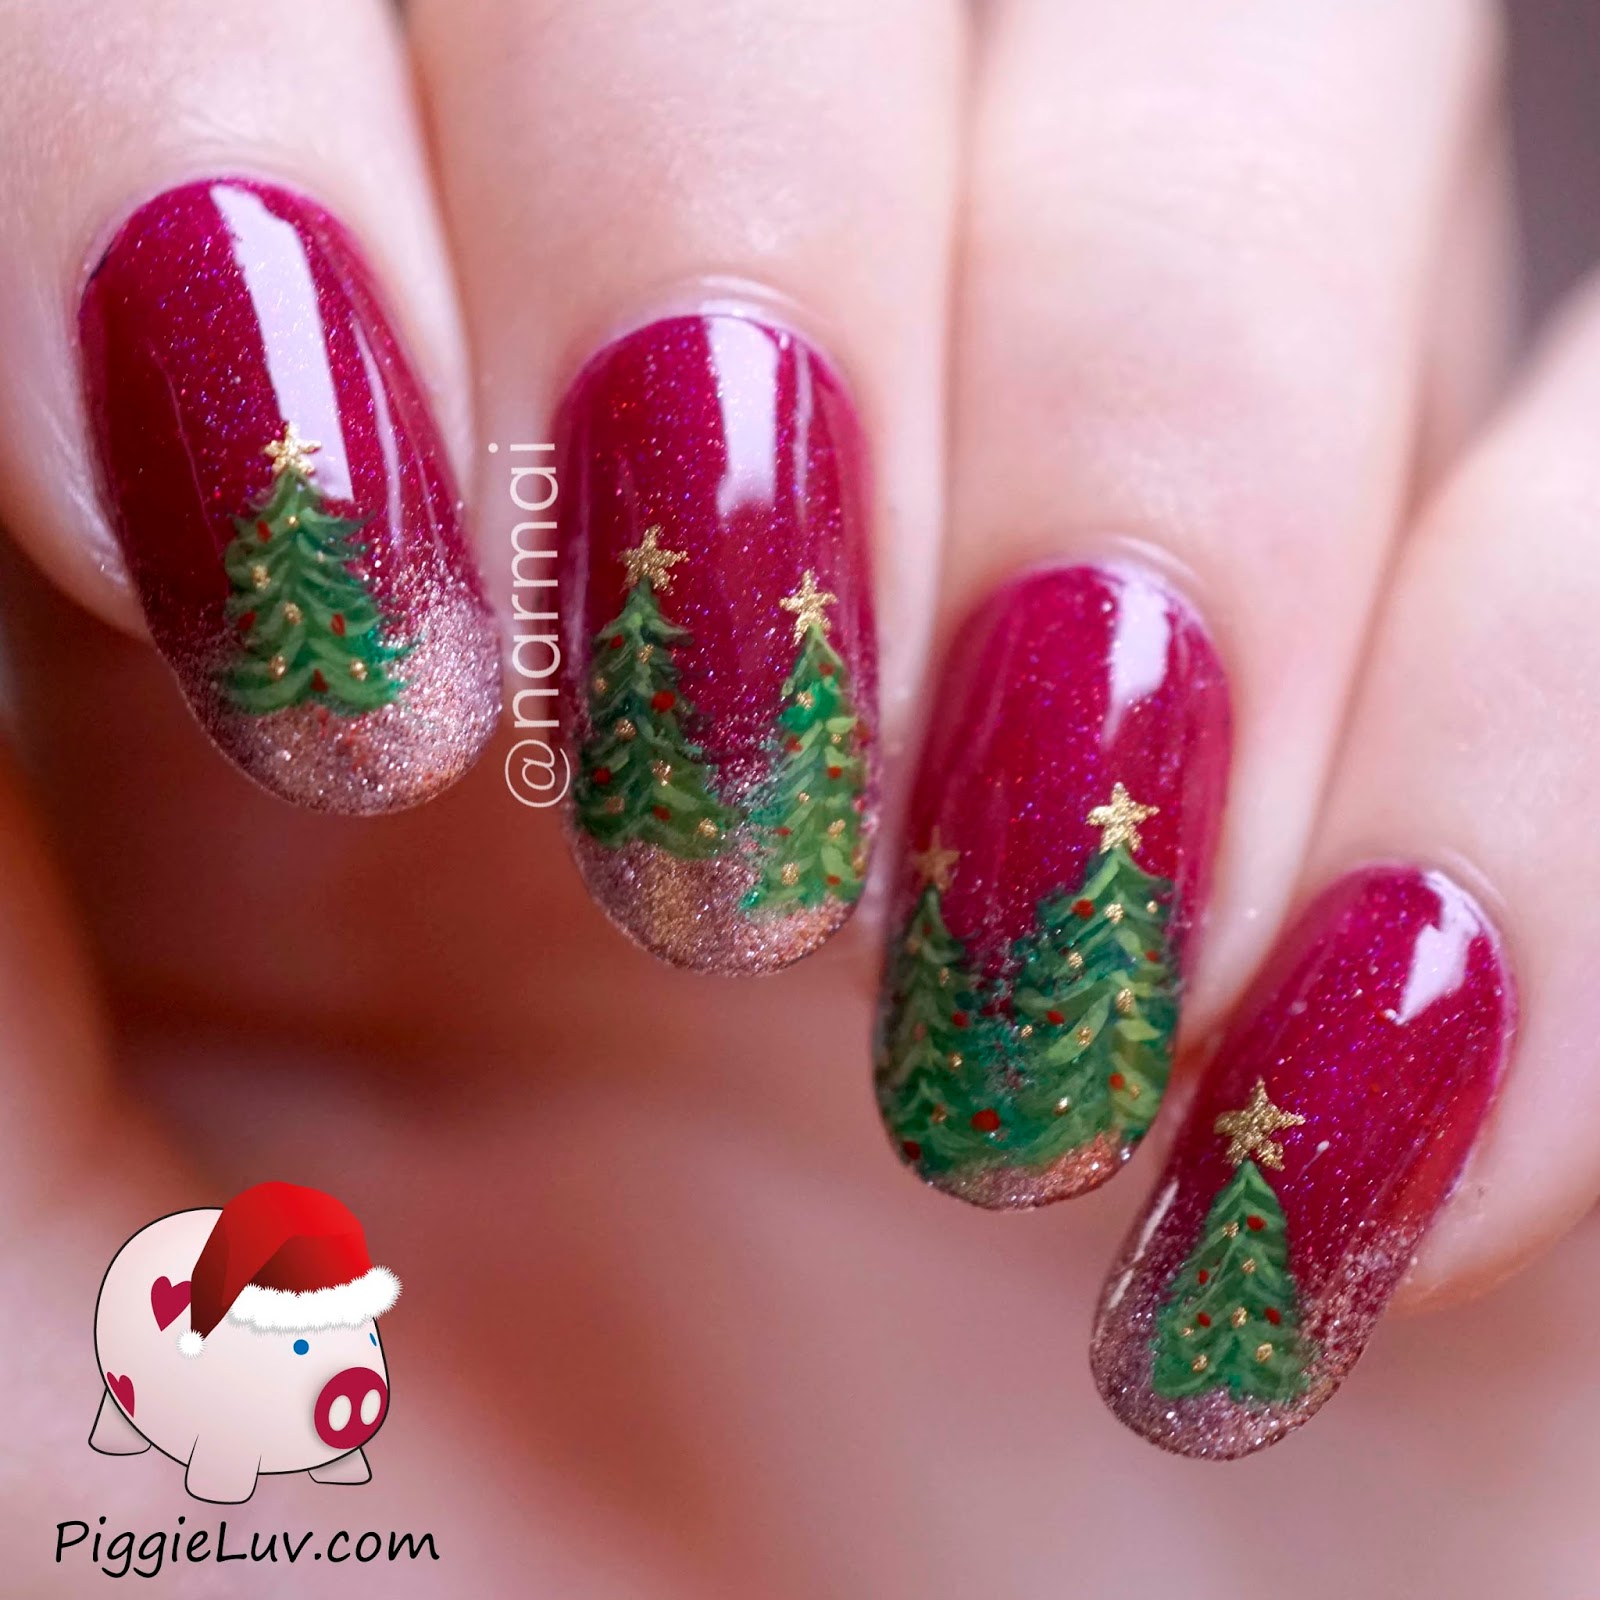
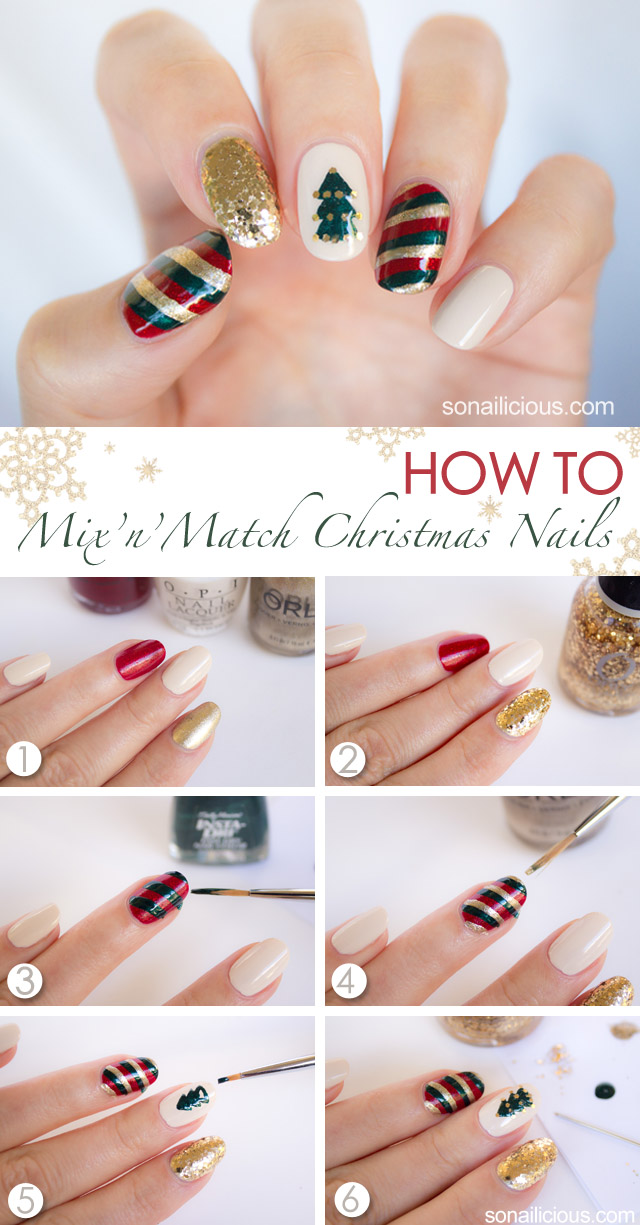
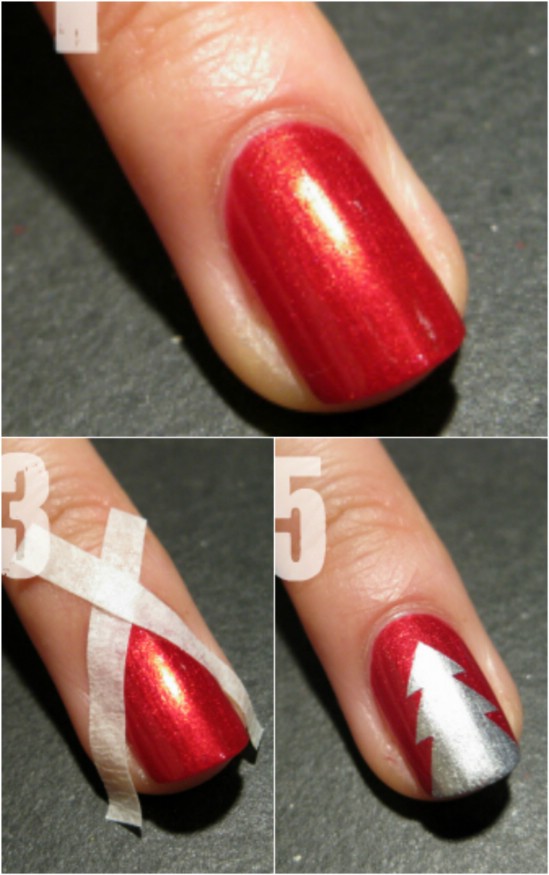
Step 4: Christmas Tree Nails
Show off your holiday spirit with adorable Christmas tree nails. Apply a green base coat and let it dry completely. Use a thin nail art brush or a toothpick to create a triangle shape at the tip of each nail using a darker green polish. Add colorful dots or nail studs as ornaments and finish with a top coat.
Step 5: Snowflake Nails

To create delicate snowflake nails, start with a light blue or silver base coat. Once dry, use a nail art brush or a dotting tool to draw intricate snowflake designs using white nail polish. Finish with a glitter top coat to add a touch of sparkle.
Step 6: Reindeer Nails
Channel your inner Rudolph with adorable reindeer nails. Apply a nude or brown base coat and let it dry completely. Use a dotting tool or a toothpick to create reindeer faces on each nail using black and white nail polishes. Add tiny red dots for the noses and finish with a top coat.
Step 7: Festive French Tips

Put a holiday twist on the classic French manicure by adding festive colors. Start with a nude or light pink base coat. Once dry, apply red or green polish to the tips of your nails, creating a diagonal line. Seal the look with a top coat to achieve a professional finish.
Step 8: Glitter Gradient Nails
Add a touch of glamour to your nails with a glitter gradient design. Start with a base coat and let it dry completely. Apply a coat of your favorite glitter polish to the tips of your nails, gradually fading it out as you move towards the base. Finish with a top coat to lock in the sparkle.
Conclusion
With these Christmas nails tutorial, you are now equipped with the knowledge to create festive and eye-catching nail designs. Get creative, experiment with different colors and patterns, and let your nails be the talk of the holiday season. Remember to have fun and enjoy the process!
