Introduction
As the winter season approaches, it's time to update your nail game with some trendy and chic winter nail designs. While visiting a salon might be the first option that comes to mind, creating stunning winter nails at home can be a fun and cost-effective alternative. In this article, we will explore various winter nail ideas and provide step-by-step instructions on how to achieve them from the comfort of your own home.
Preparing Your Nails
Before diving into the nail art, it is essential to properly prepare your nails. Start by removing any existing nail polish using an acetone-based nail polish remover. Gently push back your cuticles using a cuticle pusher and trim them if necessary. Shape your nails to your desired length and file away any rough edges. Finally, apply a base coat to protect your nails from staining and to create a smooth canvas for your winter nail designs.

Winter Nail Colors
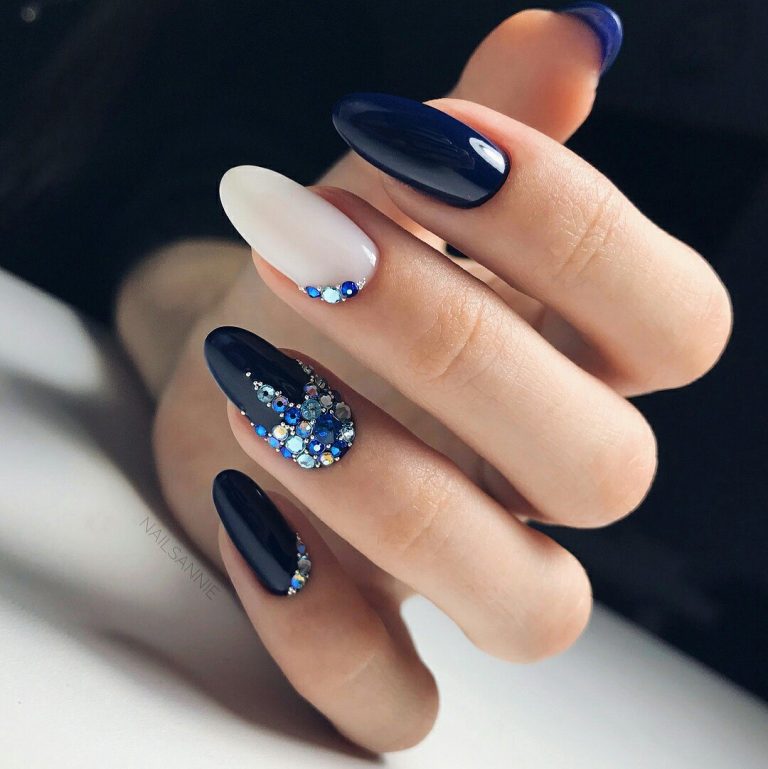
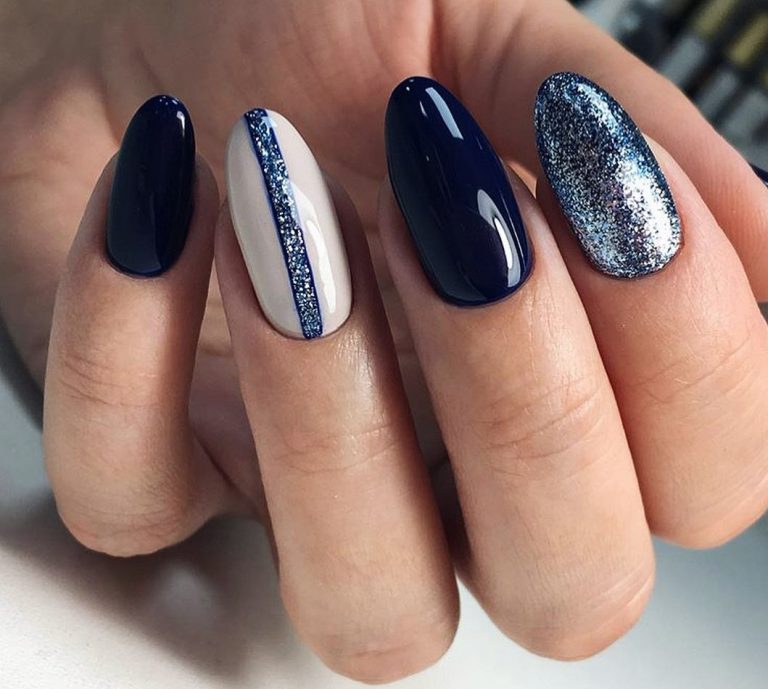
When it comes to winter nail colors, rich and deep shades are popular choices. Deep burgundy, dark greens, navy blues, and metallic silvers are just a few examples of colors that perfectly embody the winter season. However, don't be afraid to experiment with lighter shades or add some sparkle to your nails for a festive touch. Choose a color that resonates with your personal style and complements your skin tone.

Winter Nail Designs
Winter nail designs offer limitless possibilities to showcase your creativity. From intricate snowflakes to cozy sweater patterns, there is something for everyone. If you prefer a minimalist look, opt for a simple geometric design or a classic French manicure with a winter twist. For those who love a bold statement, try experimenting with ombre gradients, glitter accents, or even hand-painted winter scenes on your nails.

Tools and Techniques
To achieve stunning winter nails at home, you will need a few essential tools. Nail polish brushes, dotting tools, thin nail art brushes, and striping tapes are just a few examples of tools that can aid in creating intricate designs. Additionally, having a top coat and a quick-drying nail polish is crucial to seal and protect your designs. Practice different techniques such as stamping, marbling, or using nail wraps to add variety to your winter nail art.

Step-by-Step Guide: Winter Snowflake Nails
One of the most popular winter nail designs is snowflakes. Follow these steps to achieve stunning winter snowflake nails:
- Cleanse your nails and apply a base coat.
- Apply two coats of a dark blue nail polish as the base color. Let it dry completely.
- Using a thin nail art brush and white nail polish, draw snowflake patterns on each nail. You can find snowflake design inspiration online or create your own unique patterns.
- Allow the snowflake design to dry for a few minutes.
- Apply a quick-drying top coat to seal your design and add shine to your nails.

Conclusion
With the right tools, techniques, and a little bit of creativity, you can achieve stunning winter nails at home. Explore various winter nail designs, experiment with different colors, and don't forget to have fun with it. Winter is the perfect time to showcase your personal style through your nails. So, get ready to rock the winter season with fabulous DIY winter nails!
