
Introduction

Hello Kitty nails have taken the beauty world by storm, providing a cute and aesthetic touch to your nail art. Whether you're a fan of this adorable character or simply love trendy and creative nail designs, Hello Kitty nails are a perfect choice. In this article, we will explore various Hello Kitty nail art ideas, techniques, and tips to help you achieve stunning and unique designs. Get ready to add a touch of cuteness to your nails with Hello Kitty!
History of Hello Kitty

Before diving into the world of Hello Kitty nails, let's take a quick look at the history of this beloved character. Hello Kitty, also known as Kitty White, was created by Japanese company Sanrio in 1974. Designed by Yuko Shimizu, Hello Kitty quickly became a global phenomenon. With her iconic red bow and cute expression, Hello Kitty captured the hearts of millions around the world.
Trendy Hello Kitty Nail Designs

When it comes to Hello Kitty nails, the possibilities are endless. Here are some trendy designs you can try:
1. Classic Hello Kitty

The classic Hello Kitty design features the iconic character's face on one or multiple nails. You can either paint the face freehand or use Hello Kitty nail stickers for a quick and easy application.
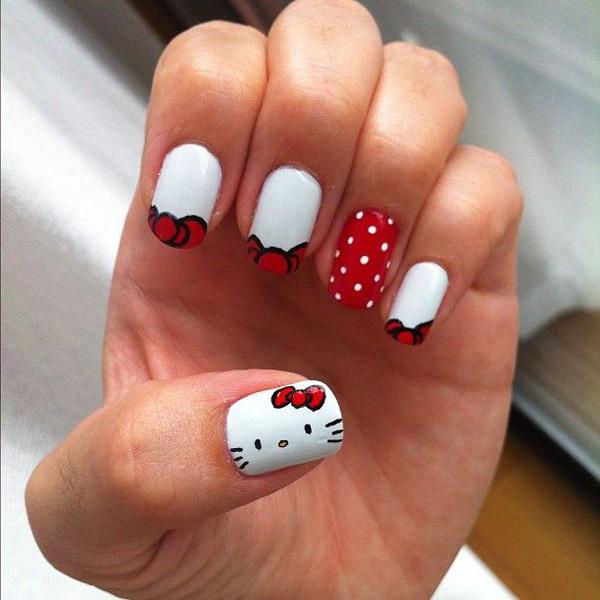
2. Hello Kitty French Tips

Add a twist to the classic French manicure by incorporating Hello Kitty elements. Instead of a plain white tip, paint the tips with Hello Kitty's signature bow or face for a cute and stylish look.
3. Hello Kitty Silhouette

If you prefer a more subtle Hello Kitty design, go for a silhouette nail art. Paint your nails in a solid color and then create the outline of Hello Kitty's head or body using black nail polish. It's a chic and minimalist way to incorporate the character into your nail art.
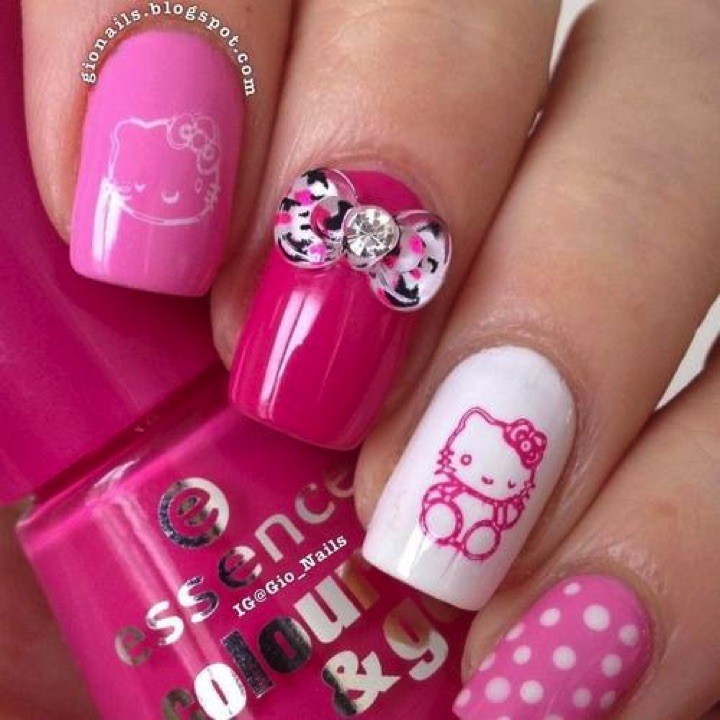
4. Hello Kitty 3D Nail Art

Take your Hello Kitty nails to the next level with 3D nail art. You can find nail charms, decals, or even create your own Hello Kitty accessories to add a three-dimensional element to your nails. It's a fun and eye-catching way to showcase your love for Hello Kitty.
5. Hello Kitty Nail Stickers

If you're not confident in your nail art skills, Hello Kitty nail stickers are your best friend. Simply apply the stickers on your nails for an instant Hello Kitty design. They come in various sizes and designs, allowing you to customize your nail art effortlessly.
Techniques for Hello Kitty Nails

Now that you have some design ideas, let's explore different techniques to achieve perfect Hello Kitty nails:
1. Freehand Painting
If you have steady hands and artistic skills, freehand painting is an excellent technique for Hello Kitty nails. Use a thin brush and nail polish to create the character's face, bow, or any other design element you desire. Practice makes perfect, so don't be discouraged if it takes a few tries to achieve the desired result.
2. Water Decals
Water decals are a popular option for achieving intricate nail designs, including Hello Kitty nails. Simply soak the decal in water, slide it onto your nail, and seal it with a top coat. Water decals provide a professional-looking finish without the need for advanced painting skills.
3. Nail Stamping

Nail stamping is a technique that uses pre-designed images on stamping plates to transfer the design onto your nails. You can find Hello Kitty-themed stamping plates that allow you to create intricate and detailed designs effortlessly.
4. Nail Wraps

If you're looking for a quick and easy way to achieve Hello Kitty nails, nail wraps are the answer. These adhesive nail coverings come in various designs, including Hello Kitty patterns. Simply apply the wrap to your nails, trim the excess, and seal it with a top coat for long-lasting results.
Tips for Perfect Hello Kitty Nails

To ensure your Hello Kitty nails turn out flawless, here are some helpful tips to keep in mind:
1. Prepare Your Nails

Start by prepping your nails. Remove any old polish, shape them, and gently push back your cuticles. This will provide a clean canvas for your Hello Kitty nail art.
2. Use Quality Nail Polish

Invest in good quality nail polish to achieve vibrant colors and long-lasting results. Look for brands that offer a wide range of shades and finishes to suit your Hello Kitty nail design.
3. Seal with a Top Coat

After you've completed your Hello Kitty nail art, seal it with a top coat. This will protect your design from chipping and help it last longer. Additionally, a top coat adds a glossy finish, making your nails look polished and professional.
4. Practice Makes Perfect

Don't be discouraged if you don't achieve perfect Hello Kitty nails on your first try. Nail art requires practice and patience. Keep experimenting with different techniques and designs to find what works best for you.
Conclusion
Embrace your love for Hello Kitty and express your creativity through Hello Kitty nails cortas. From classic designs to 3D nail art, there are endless possibilities to showcase your personal style. Remember to experiment with different techniques, practice, and have fun with your Hello Kitty nail art. The cuteness and aesthetic appeal of Hello Kitty will surely make your nails stand out.
