
Introduction
Are you looking to add some style and flair to your nails? Look no further! In this nails design tutorial, we will walk you through step-by-step instructions on how to create beautiful nail designs at home. Whether you're a beginner or an experienced nail artist, this tutorial has something for everyone. Let's get started!
Gather Your Supplies

Before diving into the world of nail art, it's important to have the right tools and supplies. Here's what you'll need:
- Nail polish in various colors
- Nail art brushes
- Dotting tools
- Nail stickers or decals
- Top coat and base coat
- Nail file and buffer
- Cotton pads and nail polish remover
Prep Your Nails
Before starting any nail design, it's essential to prep your nails properly:
- Remove any existing nail polish using cotton pads and nail polish remover.
- Shape your nails using a nail file. Choose a shape that suits your style and preferences.
- Gently buff the surface of your nails to create a smooth canvas for the nail design.
- Apply a base coat to protect your nails and help the nail polish adhere better.
Basic Nail Designs
If you're new to nail art, it's best to start with some basic designs. Here are a few ideas to inspire you:
1. Polka Dots

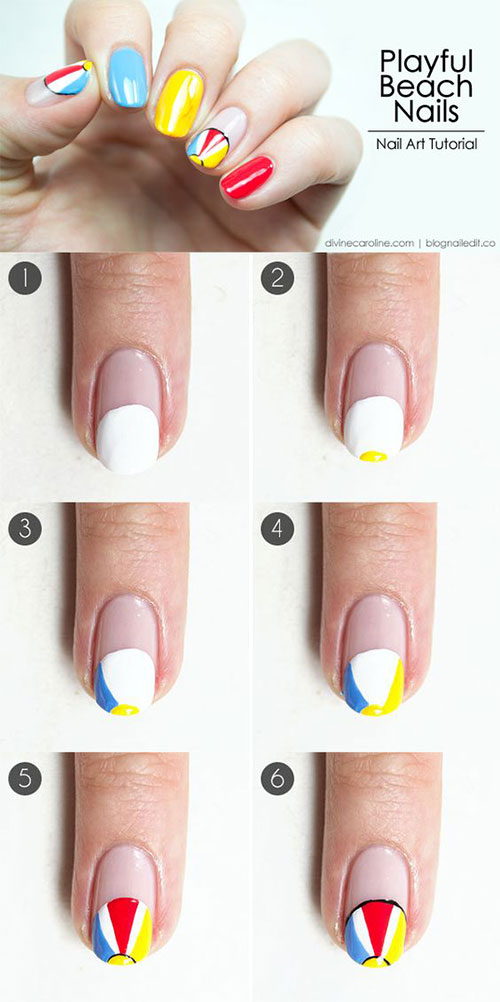
Polka dots are a classic nail design that never goes out of style. To create polka dots, dip a dotting tool into your desired nail polish color and gently press it onto your nails. You can create a pattern or randomly scatter the dots for a playful look.
2. French Tips
The French tip design is elegant and timeless. Start by applying a nude or light-colored base coat. Then, using a nail art brush or nail tape, create a clean white tip on each nail. Finish off with a top coat for a glossy finish.
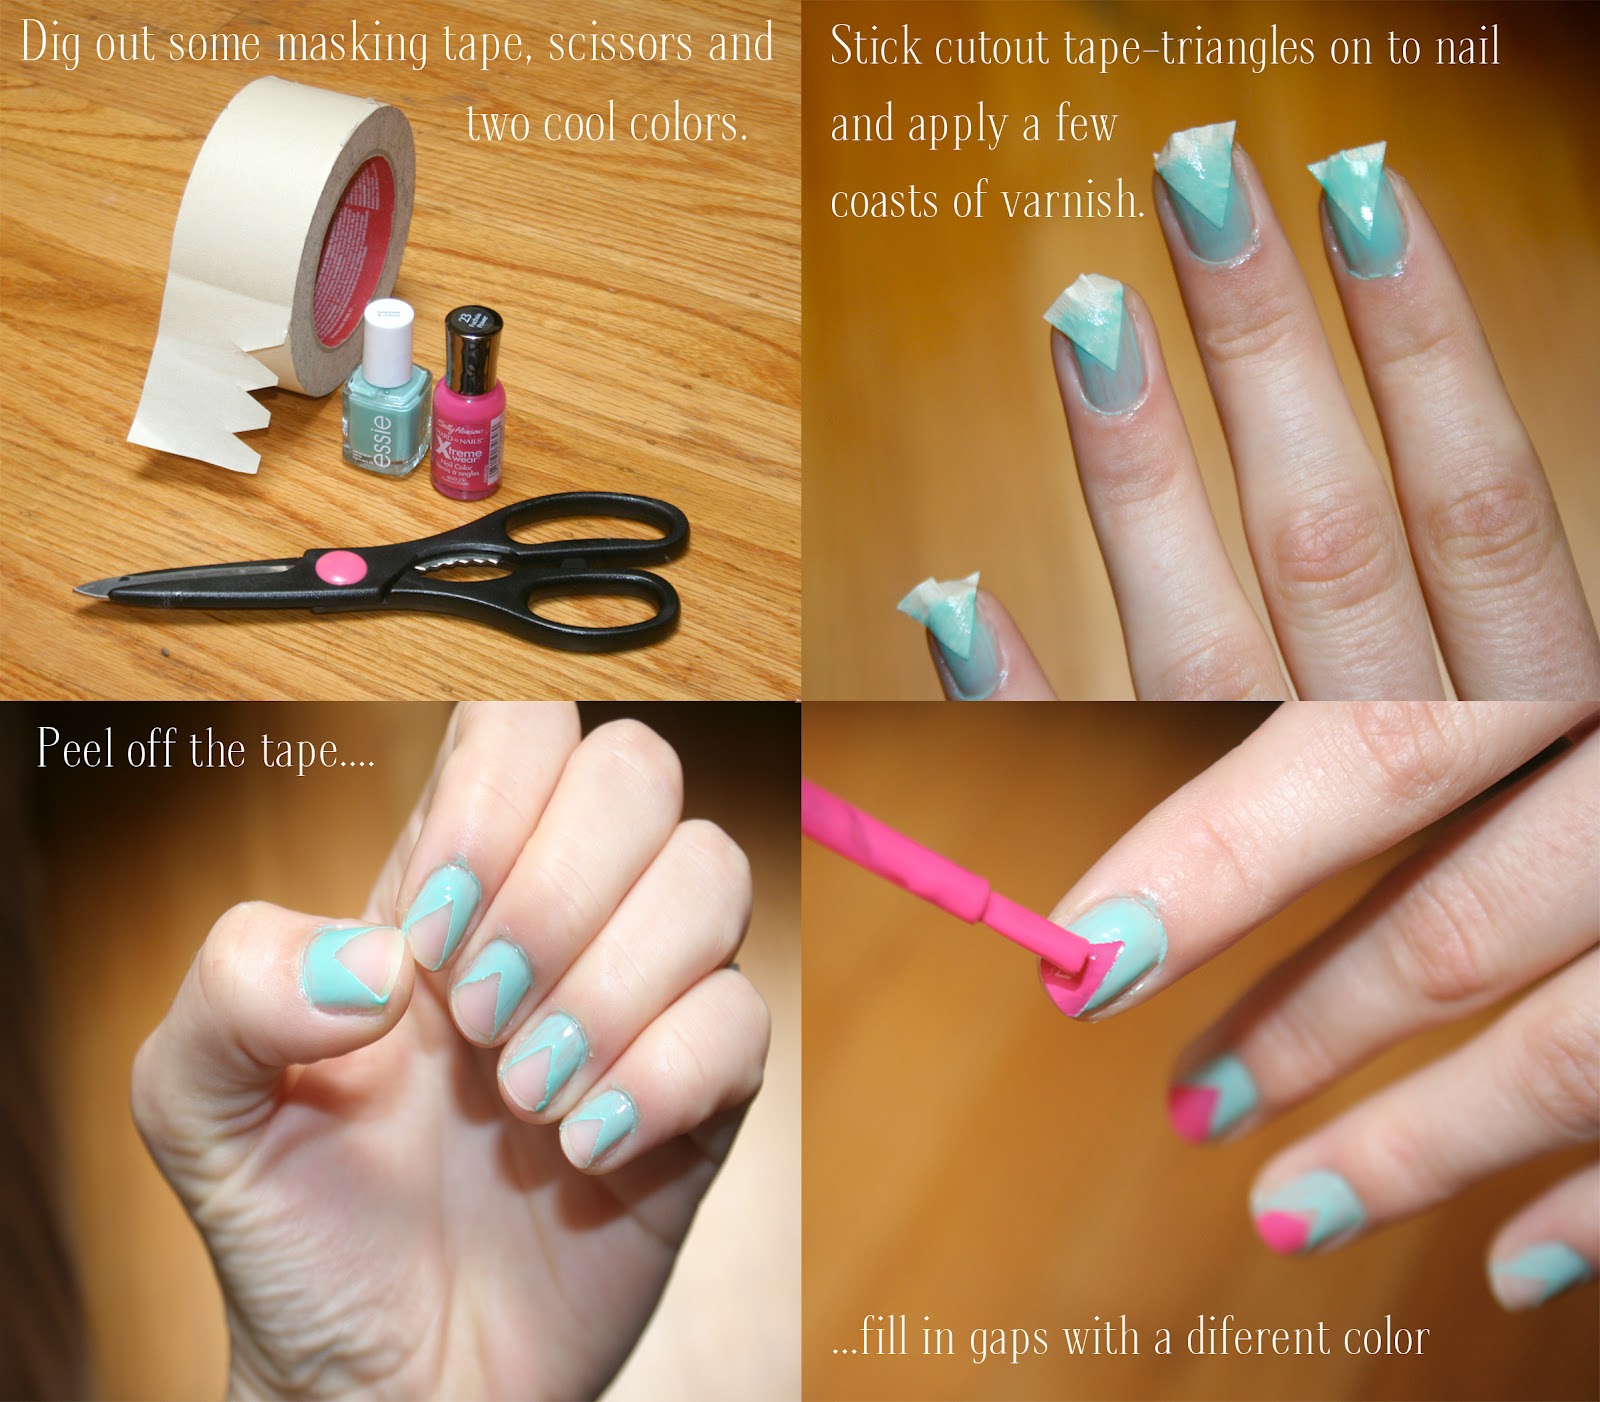
3. Stripes

Stripes add a modern and chic touch to your nails. Apply a base coat and let it dry. Then, using a nail art brush or striping tape, create straight lines or diagonal stripes on your nails using different colors. Seal the design with a top coat.
Advanced Nail Designs

If you're feeling more adventurous, try these advanced nail designs:
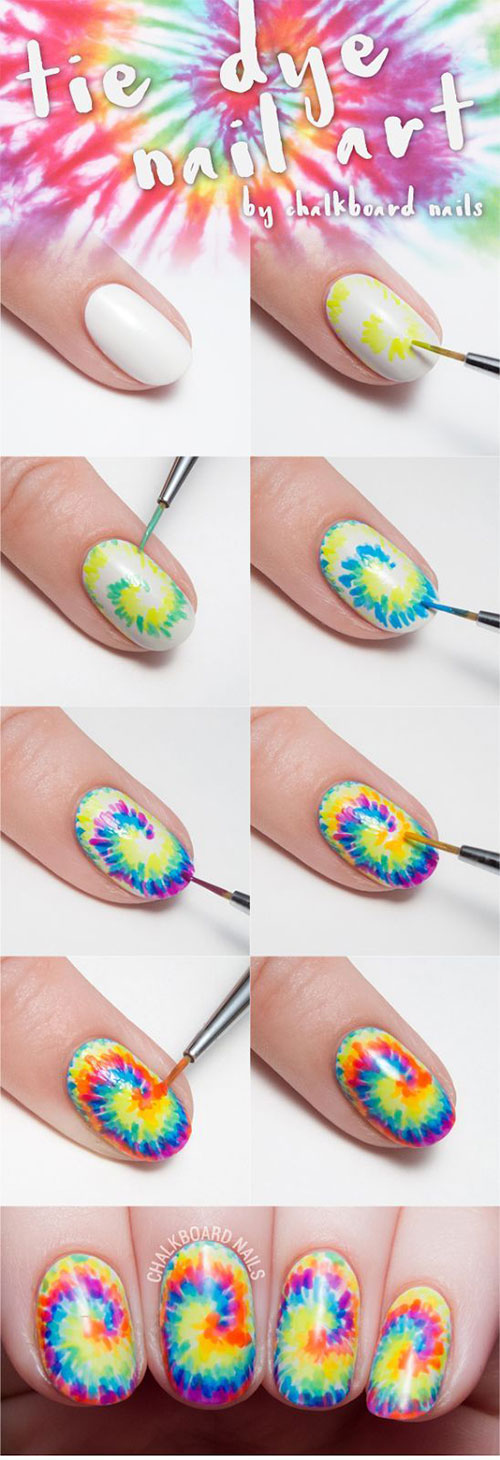
1. Floral Nail Art

Floral nail art is perfect for those who love a feminine and delicate look. Use a thin nail art brush to create intricate flower designs on your nails. Experiment with different colors and patterns to achieve stunning floral nail art.
2. Ombre Nails
Ombre nails create a beautiful gradient effect. Start with a light base color and apply a darker shade on the tip of your nails. Use a sponge or a brush to blend the colors together for a seamless ombre look. Finish off with a top coat.
3. 3D Nail Art

Take your nail art to the next level with 3D designs. You can use nail stickers, rhinestones, or even small charms to create a textured and eye-catching look. Apply a top coat to secure the 3D elements in place.
Conclusion
Nail design is a fun and creative way to express yourself. With the right tools and a little practice, you can create stunning nail designs right at home. Whether you prefer simple and elegant designs or more elaborate and intricate ones, the possibilities are endless. So grab your nail polish and brushes, and let your creativity shine!
